【iOSDC2024 #LT】3. I tried making a piano UI using Layout Protocol
This article summarizes the method of implementing the piano UI from the LT session presented at iOSDC2024, I Got an Electric Piano at Home, So I Made an App That Connects with It!.
The previous article was “2. Creating an App That Connects with an Electric Piano Using Core MIDI”.

As shown in the previous article, the piano UI implemented this time looks like this:
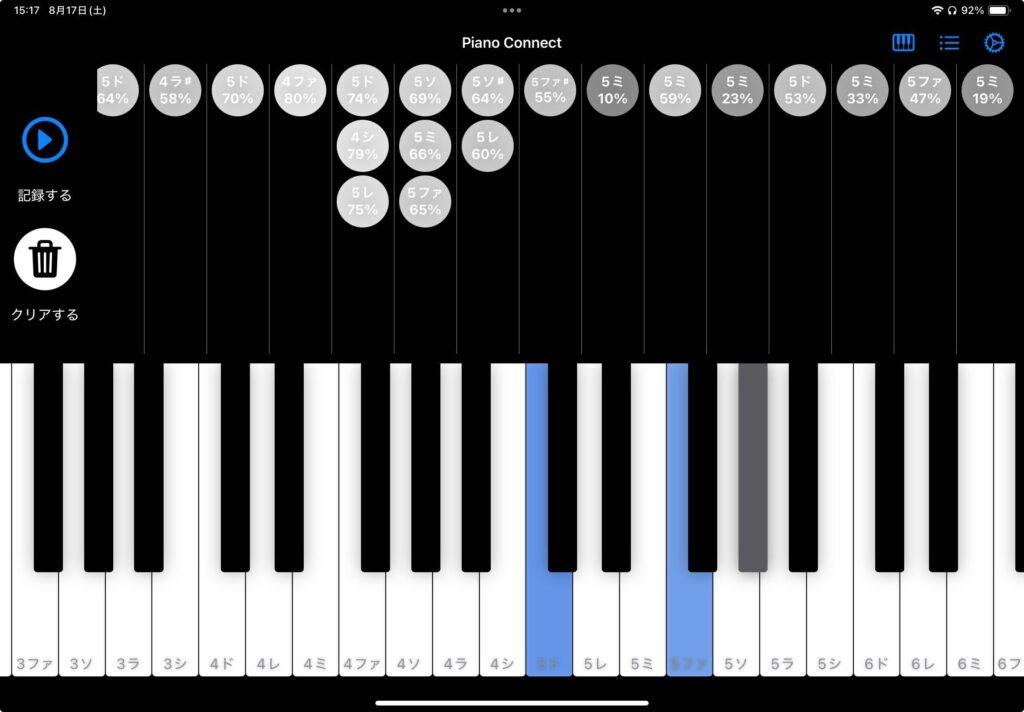
Although not fully visible in this capture, the UI allows horizontal scrolling to display the left and right keys, as it is a UI that replicates a real piano.
The displayed keys range from the C in the -1st octave to the B in the 9th octave, according to the Note number.
This article introduces how this UI was implemented.
Note that the implementation of this UI is summarized in a package called PianoUI.
Implementation of the Piano UI
Implementation of Each Key UI
First, the UI for each key is implemented as a component.
There are two types of piano keys: white and black, so two Views, White and Black, are defined within an enum called PianoKeyView.
Basically, UnevenRoundedRectangle is used as a base, and a View with a cornerRadius set only on the bottom side is placed.
A Color View is layered on top of this to indicate when a key is being pressed.
As with GarageBand’s piano keyboard UI, the note name is displayed at the bottom of the first C key of each octave by default (in the settings, you can choose to display the note names on all keys).
The size is displayed using the actual piano key’s aspect ratio by applying .aspectRatio.
Additionally, this UI supports the function of outputting the event to the electric piano when the user taps it, so it is necessary to send the tap information when the user taps.
The note name can be passed during the initialization of PianoKeyView, but the challenge is sending the keypress intensity and the event when the key is released.
Since SwiftUI alone cannot retrieve the intensity of a tap (I believe), UIKit is required to support this feature, but this function is not supported in this implementation. Instead, the value to be sent is fixed from the settings screen.
Regarding key press and release events, onTapGesture cannot capture both events.
Therefore, in the iOS app, DragGesture is used.
The release event is sent with .onEnded, and the press event is captured with .onChanged, but the event is continuously sent while the key is being tapped (dragged). To prevent duplicate events from being sent to MidiHelper, Combine‘s removeDuplicates() is used to avoid sending duplicate events for the same key.
It is important to use .simultaneousGesture instead of .gesture when declaring this DragGesture.
This is because PianoView uses ScrollView internally, and using .gesture would disable the scrolling of the ScrollView.
By the way, the above note about iOS is due to the fact that it didn’t work well in visionOS, so I will summarize this in a separate article about VisionOS support.
Implementation of the Overall Piano UI
Next is the implementation of the overall piano UI.
At first glance, it might seem like simply arranging the above PianoKeyView horizontally would suffice, but it is not that simple.
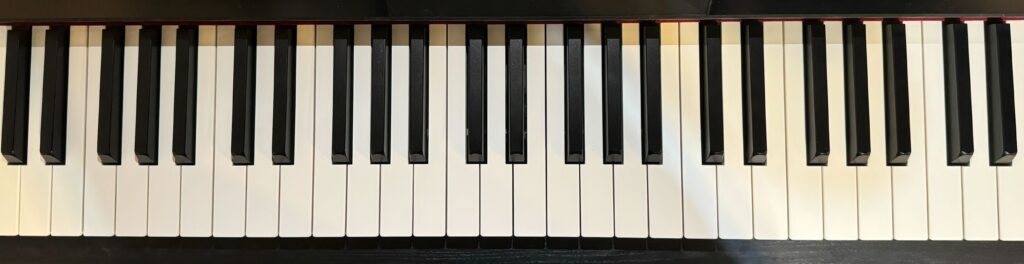
In a real piano, there is a slight gap between the keys, so a bit of spacing needs to be added.
What’s particularly tricky is that, in a real piano, the black keys are not centered exactly between the white keys but are slightly shifted to the left or right, depending on the note.
Furthermore, the view size is not fixed; the app implemented this time is expected to be used on other devices, and the PianoView is intended to be embedded in the presentation slides, so the keys need to be displayed while maintaining their aspect ratio, regardless of the display size.
Therefore, implementing this using standard HStack or ZStack would result in a very complex implementation.
Initially, I implemented it using GeometryReader, but when using GeometryReader, if the side using PianoView doesn’t correctly set the size of PianoView, it may render beyond the expected size of the parent View, making layout implementation quite challenging.
That’s why I used the Layout Protocol this time.
This Layout protocol is available from iOS 16 and allows the implementation of a container that can display complex custom layouts when simply combining standard HStack or VStack makes UI implementation difficult (the final code can be viewed here).
Using this, you can implement custom containers like HStack or VStack.
To conform to this Protocol, two functions need to be defined:
func sizeThatFits(
    proposal: ProposedViewSize,
    subviews: Self.Subviews,
    cache: inout Self.Cache
) -> CGSize

func placeSubviews(
    in bounds: CGRect,
    proposal: ProposedViewSize,
    subviews: Self.Subviews,
    cache: inout Self.Cache
)
sizeThatFits can be used to define the size of this container.
proposal can be used to get the size suggested by SwiftUI, taking into account the parent View.
In the PianoView implemented this time, a Layout called PianoLayout is defined, and the following implementation is used within sizeThatFits:
private let whiteKeyCount = KeyType.allCases.filter(.isWhiteKey).count * Octave.allCases.count

public func sizeThatFits(
    proposal: ProposedViewSize,
    subviews: Self.Subviews,
    cache: inout Self.Cache
) -> CGSize {
    let whiteKeyWidth = (proposal.height ?? 0) / AspectRatioConstants.whiteKeyAspectRatio.height * AspectRatioConstants.whiteKeyAspectRatio.width
    let width = whiteKeyWidth * CGFloat(whiteKeyCount) + CGFloat(whiteKeyCount - 1) * keyMargin
    return proposal.replacingUnspecifiedDimensions(by:
            .init(
                width: width,
                height: proposal.height ?? 0
            )
    )
}
Since PianoView uses ScrollView, the size obtained with this proposal returns the displayed size of the ScrollView.
In sizeThatFits, the size of the entire piano keyboard displayed when scrolling is returned, so the height is used as is from the proposal height.
The width is calculated by considering the width of the white keys × the number of keys (77 keys in the range of -1 to 9 octaves) plus the space between them.
The width of one white key can be calculated from the height, considering the key’s aspect ratio.
The width is then summed for the number of keys, and the space for the number of keys minus 1 is added as the total width.
The other method, placeSubviews, determines the specific placement of the Views.
Within the container’s bounds, the exact coordinates are specified, and the subviews are placed using the place function of the LayoutSubViews.Element type held by the subview.
In the PianoView using PianoLayout, the following code declares all PianoKeyView in sequence with ForEach and passes them to the PianoLayout container:
private let pianoKeys = PianoKey.allCases

ScrollView(.horizontal) {
    PianoLayout(pianoKeys: pianoKeys) {
        ForEach(pianoKeys) { pianoKey in
            if pianoKey.keyType.isWhiteKey {
                PianoKeyView.White(...)
                .id(pianoKey)
            } else {
                PianoKeyView.Black(...)
                .zIndex(1)
            }
        }
    }
}
Therefore, the View passed to the subViews of placeSubviews will be an array of the above PianoKeyView.
Considering this, the implementation is as follows:
// Assigns positions to each of the layout’s subviews.
public func placeSubviews(
    in bounds: CGRect,
    proposal: ProposedViewSize,
    subviews: Self.Subviews,
    cache: inout Self.Cache
) {
    guard !subviews.isEmpty else { return }
    let whiteKeyWidth = bounds.height / AspectRatioConstants.whiteKeyAspectRatio.height * AspectRatioConstants.whiteKeyAspectRatio.width
    let blackKeyWidth = whiteKeyWidth / AspectRatioConstants.whiteKeyAspectRatio.width * AspectRatioConstants.blackKeyAspectRatio.width

    // For some reason, the leading part is cut off from the screen by the width of the white keys * 0.5, so adjust it manually.
    var whiteKeyX: CGFloat = bounds.minX + whiteKeyWidth / 2
    subviews.indices.forEach { index in
        let pianoKey = pianoKeys[index]
        if pianoKey.isWhiteKey {
            // Place only if subview is within view range
            guard whiteKeyX + whiteKeyWidth > bounds.minX, whiteKeyX < bounds.maxX else { return }
            // Place subview
            subviews[index].place(
                at: CGPoint(x: whiteKeyX, y: bounds.minY),
                anchor: .top,
                proposal: .init(
                    width: whiteKeyWidth,
                    height: whiteKeyWidth * AspectRatioConstants.whiteKeyAspectRatio.width * AspectRatioConstants.whiteKeyAspectRatio.height
                )
            )
            // Shift the y coordinate by the height of the placed View
            whiteKeyX += whiteKeyWidth
            // Calculate the spacing between the next View and add it to the y coordinate
            let nextIndex = subviews.index(after: index)
            if nextIndex < subviews.endIndex {
                whiteKeyX += keyMargin
            }
        } else {
            let blackKeyOffset = blackKeyWidth * pianoKey.keyType.keyOffsetRatio
            // For some reason, the leading part is cut off from the screen by the width of the white keys * 0.5, so adjust it manually by minus (whiteKeyWidth / 2) .
            let blackKeyX = whiteKeyX - whiteKeyWidth / 2 - (keyMargin / 2) - blackKeyWidth / 2 + blackKeyOffset
            // Place only if subview is within view range
            guard blackKeyX + blackKeyWidth > bounds.minX, blackKeyX < bounds.maxX else { return }
            subviews[index].place(
                // Adjust the black keys by 0.5 more than the amount of the white keys that you adjusted manually.
                at: CGPoint(x: blackKeyX, y: bounds.minY),
                anchor: .topLeading,
                proposal: .init(
                    width: blackKeyWidth,
                    height: nil // Calculate height by aspectRatio
                )
            )
        }
    }
}
First, the widths of the white and black keys are calculated.
bounds is the size of the view being displayed, so in this case, the size of the entire keyboard returned by sizeThatFits can be obtained, and the width can be derived from the height.
Next, the subviews are looped through, and the Views are placed sequentially.
The PianoKey for the current loop can be obtained from the index.
First, the white keys are arranged in order, followed by the black keys on top of them.
The y-coordinate is fixed at bounds.minY, so only the x-coordinate needs to be calculated.
To calculate the x-coordinate, whiteKeyX defined outside the forEach loop is incremented by the width of the white keys and the space between them for each loop, and the subviews are placed using the place function according to that value.
A point to note is that when displayed as is, the leading half of the white keys is cut off, so it is manually adjusted by 0.5 in the + direction (the cause is unknown at this time).
After that, the black keys are arranged.
The whiteKeyX used in the white key calculation is used as a basis to adjust the black keys so that they are placed at the top left of the white keys.
let blackKeyX = whiteKeyX - whiteKeyWidth / 2 - (keyMargin / 2)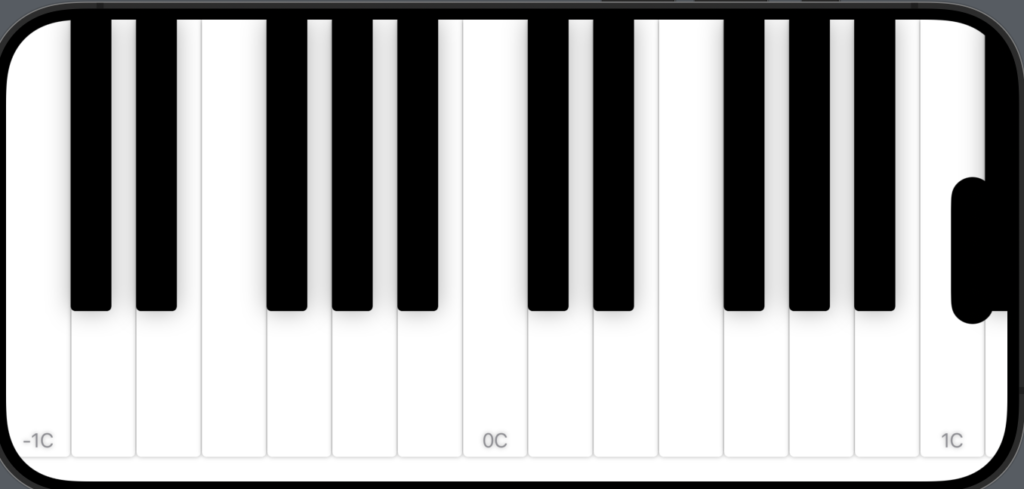
The whiteKeyWidth / 2 accounts for the part of the white key that gets cut off the screen as described earlier.
The (keyMargin / 2) accounts for the space between the keys.
The key point is to specify anchor: .topLeading.
This aligns the subviews to the top left.
After that, the black keys are shifted half a key to the left, and minor adjustments are made according to the key positions, and it’s done.
let blackKeyX = whiteKeyX - whiteKeyWidth / 2 - (keyMargin / 2) - blackKeyWidth / 2 + blackKeyOffsetThe black keys can then be displayed above the white keys by specifying .zIndex(1).
Finally, let’s consider rendering performance.
The PianoView uses ScrollView, so not all of the Views specified by sizeThatFits are actually displayed.
Therefore, there is no need to place Views that are not displayed.
So in this case, I implemented it so that subviews outside the display area are not placed, as shown below:
guard whiteKeyX + whiteKeyWidth > bounds.minX, whiteKeyX < bounds.maxX else { return }And with that, the implementation of PianoView is complete 🎉.
By the way, .id(pianoKey) is set for the white key View in the definition of PianoView, so that ScrollViewReader can be used to specify the initial display position of a specific PianoKey when the View is displayed.
Conclusion
In this article, I summarized the implementation of the piano UI using the Layout Protocol.
The next article is “4. Creating Slide Animations with SwiftUI”.