Sponsoring
Contents
iOS13以降でSceneDelegateを使わないでアプリを作る
iOS13からSceneDelegateが標準装備になった!
SceneDelegateは同じアプリを複数立ち上げる際に使われる仕組みです。Apple製のアプリはほとんど対応しています。
しかし技術的な理由から、複数立ち上げられないようにしたい、また立ち上げる必要がないといった場合、iOS12以前と同じく、SceneDelegateを使用せず、AppDelegateだけで開発をしたいということもあるでしょう
(AppDelegateとSceneDelegateの両方を管理しないといけないし、、)。
そのような場合にどうすればいいかを調べたので、備忘録をかねて、投稿しておきます。
検証環境
- Xcode11.3
- iOS13.3
脱SceneDelegateに必要な手順は3つ!
1. AppDelegate.swiftに書かれている以下のメソッドを削除します。
    // MARK: UISceneSession Lifecycle

    func application(_ application: UIApplication, configurationForConnecting connectingSceneSession: UISceneSession, options: UIScene.ConnectionOptions) -> UISceneConfiguration {
        // Called when a new scene session is being created.
        // Use this method to select a configuration to create the new scene with.
        return UISceneConfiguration(name: "Default Configuration", sessionRole: connectingSceneSession.role)
    }

    func application(_ application: UIApplication, didDiscardSceneSessions sceneSessions: Set<UISceneSession>) {
        // Called when the user discards a scene session.
        // If any sessions were discarded while the application was not running, this will be called shortly after application:didFinishLaunchingWithOptions.
        // Use this method to release any resources that were specific to the discarded scenes, as they will not return.
    }
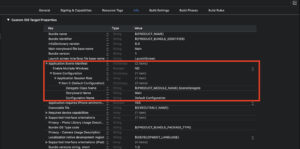
2. Info.plistのUIApplicationSceneManifestのkeyを削除
info.plistのUIApplicationSceneManifestのkeyを項目ごと全て削除します。この項目は、アプリのSceneの動作に関する設定が記載されています。SceneDelegateを使わない場合は、不要になります。
3. AppDelegate.swiftにwindowを追加
AppDelegate.swift にvar window: UIWindow?を追加する。 これで後はSceneDelegate.swiftファイルを削除するだけです!
修正点あれば、指摘ください!
+1
Sponsoring
