5. Use the motion sensor – attack from here
This article is based on the session presented at iOSDC2022, Make your home safer and more convenient with Swift!
This article is a continuation of “4. Linking with a card reader – reading Suica ID“. If you haven’t read it yet, please read it!
In this article, I will introduce how to use the motion sensor, how to execute Bash code from Swift, and how to use SwitchBot’s API.

Perform processing with the motion sensor as a trigger
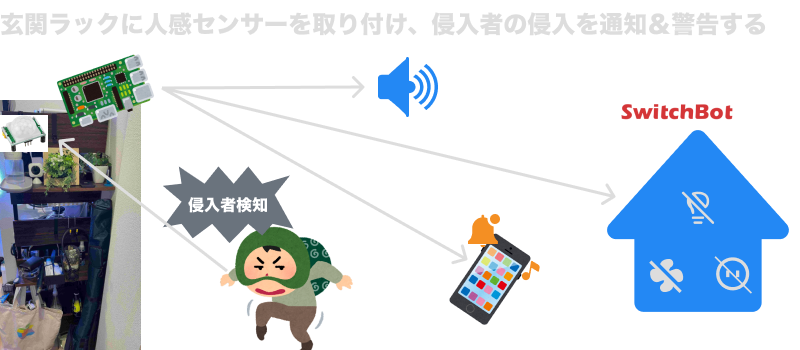
This time, the motion sensor linked to the Raspberry Pi is activated, The landlord is not at home There is nothing in ③, we aim to execute ↓ only when it is not authenticated with Suica
- Play warning sound with speaker
- Move device with SwitchBot
- Send push notification (omitted in announcement)
- Intrusion with camera Take a picture of the person and post the image on Twitter (to be implemented in the future)
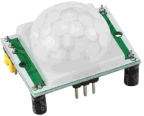
The motion sensor used this time is from ↓!
The implementation image is as follows!
Implementation of motion sensor integration
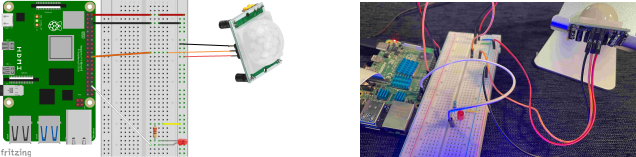
Let’s make a circuit first!
This time we are using 2 power supplies and 1 for communication (orange/GPIO25)
Also, when a person is detected, the LED will light up!
Let’s check the code next!
First, as usual, set up a GPIO instance!
As explained in the circuit section, GPIO for the motion sensor and LED are set up.
let humanSensorGpio = gpios[.P25]!
let humanSensorLedGpio = gpios[.P16]!

humanSensorGpio.direction = .IN
humanSensorLedGpio.direction = .OUT
humanSensorLedGpio.value = 0
Next, let’s monitor the GPIO value
SwiftyGPIO contains a method to monitor changes in the GPIO value. and this time we use that method.By using the method onChange, the value changes to 1<->0 Then, the closure is called, so set the LED on/off in it and implement the process to notify the change.
humanSensorGpio.onChange { gpio in // ①Called when value changes
    if gpio.value == 1 {
        // Human detected
        self.humanSensorLedGpio.value = 1 // ②turn on the LED
        // (Omit: notify change)
    } else {
        self.humanSensorLedGpio.value = 0 //③turn off the LED
        // (Omit: notify change)
    }
}
Finally, I implemented a method that uses the above process.
Receive bool value of didDetected in closure
And when didDetected is true, the process can be executed.
// ①methods for monitoring
GpioManager.shared.observeHumanMoved { didDetected in
    if didDetected {
        print("Human detected!")
        // (Omit: Execute processing when a person is detected)
    } else {
        print("Human Not detected!")
    }
}
When you’re ready, let’s try it out!
I was able to confirm that the motion sensor was working properly and was able to detect human movements! 🎉
Implementation details for playing alert sounds
Next is the implementation of the function to play a warning sound for intruders!
This time use the command mpg123 to play the sample mp3
Sample above from Swift It’s like running a shell script that plays audio!
When executed, a warning sound will be played from the speaker connected to the Raspberry Pi’s earphone jack!

First, implement common processing to execute a shell script from Swift (Reference)
@discardableResult
func shell(_ args: String...) throws ->  Int32 {
    let task = Process()
    task.executableURL = URL(fileURLWithPath: "/usr/bin/env")
    task.arguments = args
    try task.run()
    task.waitUntilExit()
    return task.terminationStatus
}
For Mac, you need to specify mp3 as a resource in Package.swift, so add
resources: [
    // Copy resource file to bundle
    // Mac: Build artifacts are generated in the DerivedData directory
    // Linux: You can directly refer to the audio files in the cloned directory
    .process("warning_voice.mp3"),
]
As mentioned in the comments above, the command path and the mp3 path of the built artifacts are different between Mac and Linux, so set them separately.
On Mac, the runtime mp3 path will be the DerivedData path, and on Linux it will be the repository cloned path.
let command: String
let path: String
#if os(Linux)
    command = "/usr/bin/mpg123"
    path = "(Path.current)/Sources/SwiftHomePi" // If linux, returns repository path
#else
    command = "/opt/homebrew/bin/mpg123"
    // If Mac,  returns DerivedData path
    path = "(Path.current)/SwiftHomePi_SwiftHomePi.bundle/Contents/Resources"
#endif
Finally, set the prepared command and mp3 path to the common method for executing Shell implemented above
The command and parameters should each be set as separate Strings
let voiceFilePath = "(path)/warning_voice.mp3"
do {
    // ①Separate commands and parameters
    try shell(command, voiceFilePath)
} catch {
    print(error)
}
Implementation details to move the SwitchBot device
Next is the implementation to move the SwitchBot device!
This time we have power strip and light tape is operated!
The power plug can be turned ON/OFF via the network, and the tape light can be turned ON/OFF and the color type via the network!


I wrote a separate blog about how to use the SwitchBot API!
Check here for details! !
This time, I will connect the stand lighting I bought at IKEA to the power tap and put it on the entrance rack.
When detected by the motion sensor, turn on the 60W (very bright) light bulb on the stand to deprive the intruder of sight!
The 60W light is quite bright, and if it suddenly turns on, it will definitely take your vision away! smile

By the way, I arbitrarily call this system “Sun Fist System“! lol

The tape light flashes red and white to warn of intruders!
Demo
Let’s move the things implemented above together!
Since this is a demo, I set up a Raspberry Pi and a motion sensor on the desk, and when I put my hand over it
(1) the light on the stand turns on via the power tap, (2) the tape light turns on, and (3) the warning sound plays.
The process will be executed in the order of
!
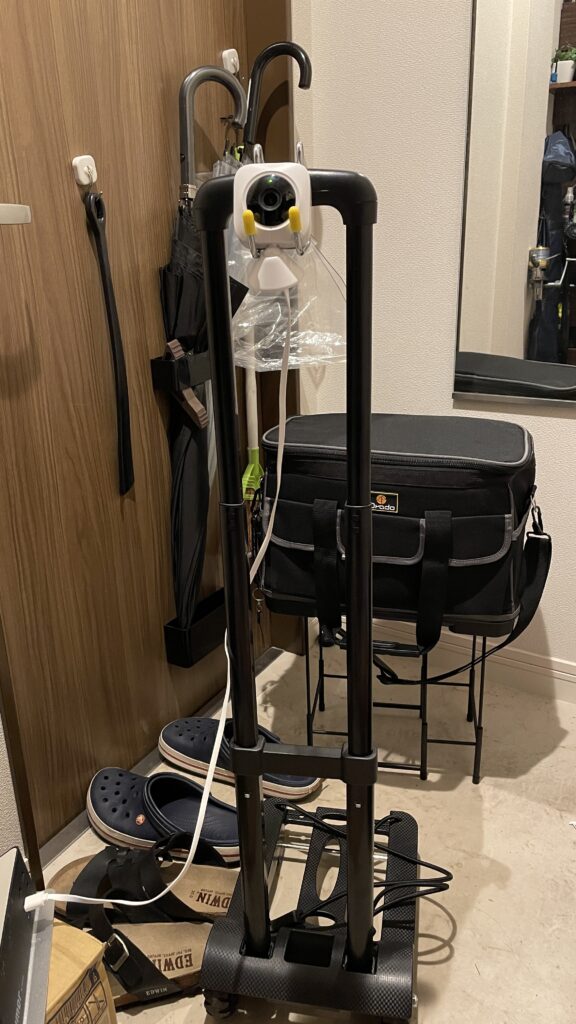
In addition, the video below was filmed with SwitchBot’s indoor camera attached to the front door! Lol
The camera I usually have at the entrance for monitoring was usefullol
I was able to get it to work as expected! !🎉🎉🎉
Wrap up
This is the end of the introduction for Part 5
We were able to use what we implemented in Part 4 and introduce it with a demo!
Although I was joking around with the sun fist, I thought it was good that I was able to implement something that could actually be introduced!
Next is an article that summarizes the presentation