Summary – After implementing SwiftHome
This article is based on the session presented at iOSDC2022, Make your home more convenient and safe with Swift!
This article is a continuation of the article “5. Use the motion sensor – attack from here“. If you haven’t read it yet, please read it!

This time, I implemented various functions using Swift and Raspberry Pi!
In summary….
- You can develop Raspberry Pi with Swift that you usually write
- By using Vapor,
- Expansion of commercially available smart home functions by adding implementations that can easily implement APIs and Socket communication with Swift
- However, it is necessary to catch up with hardware technology such as Raspberry Pi and GPIO
- Various parts and tools
Something like that!
It’s fun to be able to develop hardware in addition to the iOS development that I usually do with Swift, but it’s a bit of a loss to my wallet to spend extra money to buy tools and parts.
Also, developing with Swift on a Raspberry Pi has more restrictions than developing with Xcode on a Mac
- Raspberry Pi OS only allows older Swift versions (v5.1.5 at time of writing)
- Swift Concurrencey was pretty hard. .
- With UbuntuOS, the implementation of hardware-related settings such as the camera implementation is more difficult than the Raspberry Pi OS.
- I didn’t have enough time to announce it, so it didn’t go well, but maybe I can manage it somehow depending on how I do it
From now on, I would like to try various things other than what I announced this time as an electronic work! !
- When the motion sensor detects it, take a picture with the camera and tweet
- Display carbon dioxide sensor information in SwiftUI Charts in the app
- Foliage Water the plants automatically or regularly
- Try using a soil humidity sensor
- Make locking and unlocking the front door more convenient
- Using the motor to trigger an action
Recommended smart home configuration
By the way, if you haven’t turned your house into a smart home yet, I recommend trying to turn it into a smart home with the following configuration first! (You can prepare it for about 10,000 yen!)
This configuration alone will boost your QOL, so it’s recommended! !
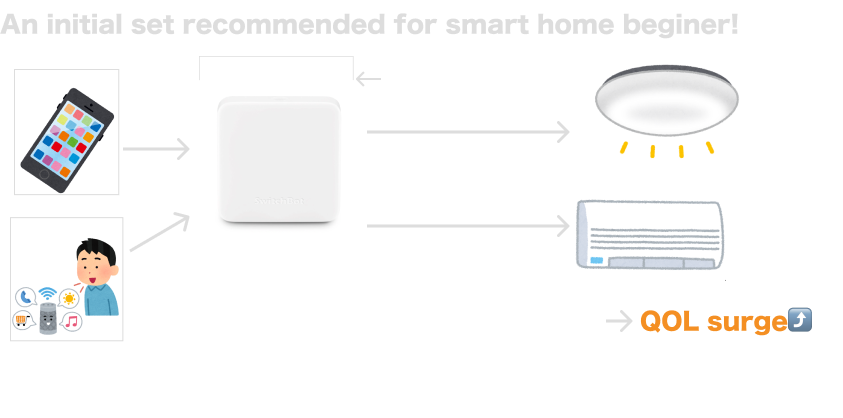
If you have a ceiling light that can’t be operated with an infrared remote control, or if it’s not a ceiling light in the first place, SwitchBot’s ceiling light or light bulb may be a good idea!
Also SwiftHome slide created this time is Figma!
The details are summarized in the article below!
Although it was not included in the announcement, there is also an article summarizing GoogleHome’s implementation of calling Raspberry Pi’s processing, so if you are interested, please read it. please look!
https://ulog.sugiy.com/en/bonus-2-goolehome-webhookThis is the end of the presentation content!
Thank you for reading until the end! !
Reference materials and information used in the presentation
- 『これ1冊でできる! ラズベリー・パイ 超入門 改訂第6版」(福田 和宏)
- Vapor Docs
- Swift on Raspberry Pi
- ラズベリーパイのレシピ
- ラズパイにパソリを繋いでNFCタッチ!
- SwitchBot API