I want to be able to take screenshots of iOS apps automatically
It’s annoying to have a screenshot when you release the app. ..
When I tried to submit the app for the first time, it was written in AppStoreConnect that I had to upload screenshots of 4 different device sizes, so I took it manually thinking that it was difficult, but I managed to take the screenshot automatically.
I wondered if there was one, so I looked it up. I will summarize the general flow for implementation and the stumbling block.
・Automatically take screenshots of multiple devices
- Take a screenshot for Apple review
- Check if the layout is broken on devices of different sizes such as iPad and iPhone SE
- Check if it is correctly localized in multiple languages such as ja / en
- Check if the layout is broken in multiple OS versions
(Originally, the purpose was only 1., but I got greedy and it increased steadily.)
There are various tools for taking screenshots, but in addition to what I want to do above,
- I already have Fastlane
- I want to touch UITest
- I can see the screenshots you took in a list
Based on the above, I decided to use Fastlane‘s Snapshot. Since my project uses XcodeGen, I’m assuming that it is installed, so if you are not using it, please skip it. Also, the word HomeNote sometimes comes up, which is the name of my personal app.
Step
1. Introducing Fastlane and Snapshot
It’s difficult, To avoid reinventing the wheel, I think that you can roughly do it by referring to the articles around here.
Fastlane
Snapshot
2. Add the files added by Snapshot to the project.
Once the Snapshot setup is complete, SnapshotHelper.swift will be added so you can add it to your project.
Add the description to add SnapshotHelper.swift to the Target item of UITest of project.yml as follows.
In this project, I put it in Supporting Files.
targets:
  HomeNote:
    ...
    sources:
      - path: HomeNote
        name: HomeNote
        excludes:
          - "*/SnapshotHelper.swift"
  HomeNoteUITests:
    ....
     sources:
       - path: HomeNoteUITests
         name: HomeNoteUITests
       - HomeNote/SupportingFiles/SnapshotHelper.swift
3. Write UITest code and screenshot code
I will write the code of UITest. Please refer to this article etc. for how to write UITest.
In UITest, the ID is set for the UI part in the Target code on the application side, and each part is specified using that ID in the UITest code, but if you hard-code each part, the test will fail when one is changed. So you can use a common ID.
For example, create the following enum.
enum HogeViewControllerIdentifiers: String {
    static let viewControllerName = "HogeViewController"

    case hogeButton
    case hogeLabel

    var id: String {
        return HogeViewControllerIdentifiers.viewControllerName + rawValue
    }
}
And set the ID as follows, so that it is set only at the time of testing.
Since the Configuration for Test is set in the HomeNote app, it will be as follows, but if it is not set, please refer to here in the document.
extension HogeViewController {
    func setupUITestIdentifier() {
        #if TEST
        hogeButton.accessibilityIdentifier = HogeViewControllerIdentifiers.hogeButton.id
        hogeLabel.accessibilityIdentifier = HogeViewControllerIdentifiers.hogeLabel.id
        #endif
    }
}
And add it to project.yml so that the above enum is also called from Target of UITest.
sources:
      - path: HomeNoteUITests
        name: HomeNoteUITests
      - HomeNote/SupportingFiles/SnapshotHelper.swift
      - HomeNote/Views/HogeViewControllerIdentifiers.swift
Finally, write the UITest code. Add the following method to the UITest file.
func testSnapshot() throws {
    let app = XCUIApplication()
    // Snapshot setup (execute the method of SnapshotHelper.swift)
    setupSnapshot(app, waitForAnimations: false)
    app.launch()
    // Take a screenshot of the screen that opened first
    snapshot("A-HogeViewController")
    app.buttons[HogeViewControllerIdentifiers.hogeButton.id].tap() // Present HogeModalViewController
    // Tap the hogeButton to take a screenshot of the opened screen
    snapshot("B-HogeModalViewController")
}
4. Allows you to switch to Mock during testing.
Since it is a screenshot to be displayed on the App Store, I will switch to Mock data when taking a screenshot so that data that looks like it can be displayed fixedly. In the HomeNote app, data is acquired from Firebase while logged in and from Realm when not logged in, but during the test, the acquisition destination can be switched to MockManager.
Dependency injection is used, but this app implements Dependency Injection using PropertyWrapper by referring to this site.
The following is an example, so I hope you can match it with the implementation of each application.
static var requesterModule: Module {
    return Module { () -> RequesterProtocol in
        #if TEST
        return MockManager()
        #endif
        if authManager.isAuthenticated {
            return FirebaseRequester()
       } else {
            return LocalRequester()
        }
    }
}
5.Prepare a Snapfile
Prepare a setting file for taking screenshots with Snapshot.
Below is the Snapfile for the HomeNote app.
# A list of devices you want to take the screenshots from
devices([
  "iPhone 8 Plus",
  "iPhone 11 Pro Max",
  "iPad Pro (12.9-inch) (4th generation)"
])

languages([
  "ja",
  "en-US"
])

# The name of the scheme which contains the UI Tests
scheme("HomeNote_Develop")
ios_version("13.4")

# Where should the resulting screenshots be stored?
output_directory("./fastlane/screenshots")
sdk("iphonesimulator")
erase_simulator(true)

clear_previous_screenshots(true)
localize_simulator(true)
dark_mode(true)

# You can set override_status_bar to true to set the status bar to Tuesday January 9th at 9:41AM with full battery and reception.
override_status_bar(true)
stop_after_first_error(true)
html_template("./fastlane/screenshots/screenshots.html")
skip_open_summary(false)

# By setting the following, only the UITest method set above can be executed.
only_testing("HomeNoteUITests/HomeNoteUITests/testSnapshot")

# If you want to skip the build, set the following
test_without_building(true)
derived_data_path("path/to/derived_data")
As a caveat, if you do not have a simulator with the corresponding device and OS combination, execution will fail, so you should be careful in advance.
It is convenient to run the command xcrun simctl list because it will display a list of available simulators along with the OS version.
6. Execute!!
bundle exec fastlane snapshotIn the HomeNote app, describe it in the Makefile and
make snapshotI am trying to execute it with.
The time to finish taking a screenshot depends on the number of screens, the number of devices and languages, and whether to skip the build, but it takes some time, so after executing it, another work, nap, rice, bath, light exercise, etc.
Let’s leave it while doing and wait for the test to finish!
When finished, a screenshot file will be created in the Path specified by Snapfile.
It also creates the following html file that allows you to see them in a list.
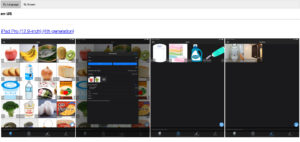
Additional implementation (bonus)
1. I want to be able to share the list of screenshots in PDF!
When I wanted to share the list of screenshots with other people, I made all the screenshots and html into a zip and shared it, so I made it into a PDF so that I could easily share it.
After a lot of research, I decided to use wkhtmltopdf.
Install with Homebrew
brew cask install wkhtmltopdfAfter that, describe the process of converting to PDF. In this app, it is described in the Makefile. This will create screenshots.pdf.
pdf:
  wkhtmltopdf --title HomeNote-Snapshot --enable-local-file-access ./fastlane/screenshots/screenshots.html ./fastlane/screenshots/screenshots.pdf
By the way, please refer to here for the reason for adding --enable-local-file-access.
2. I want to be able to take screenshots of multiple OS versions at once.
With standard Snapshot, you can only take one version of the screenshot, so if you want to take a screenshot of multiple OS versions, you need to switch ios_version once and execute it, so it is not impossible, but it is quite troublesome. ..
So I created MultiOSVersionSnapshot, a tool that can take screenshots of multiple OSs at once. It simply loops the Snapshot internally. It can be installed with Mint.
Added u5-03/MultiOSVersionSnapshot to Mintfile
mint bootstrapexecute!
Create a configuration file like Snapfile, MultiOSVersionSnapshot.yml, at the top level. Check here for a sample.
All you have to do is execute the following command and wait.
mint run MultiOSVersionSnapshot MultiOSVersionSnapshotAs shown below, a folder containing screenshots is created for each OS version.
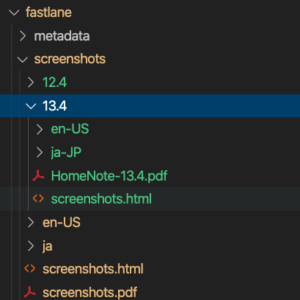
Summary
I think it was good that I was freed from the trouble of taking screenshots one by one.
Regarding UI check, I thought that if I use Xcode preview (mainly used in SwiftUI) in the future, it will not take much time, so I thought that I do not have to bother to use it, but about the UI test method I was able to confirm it by the way, so I think it was helpful.